
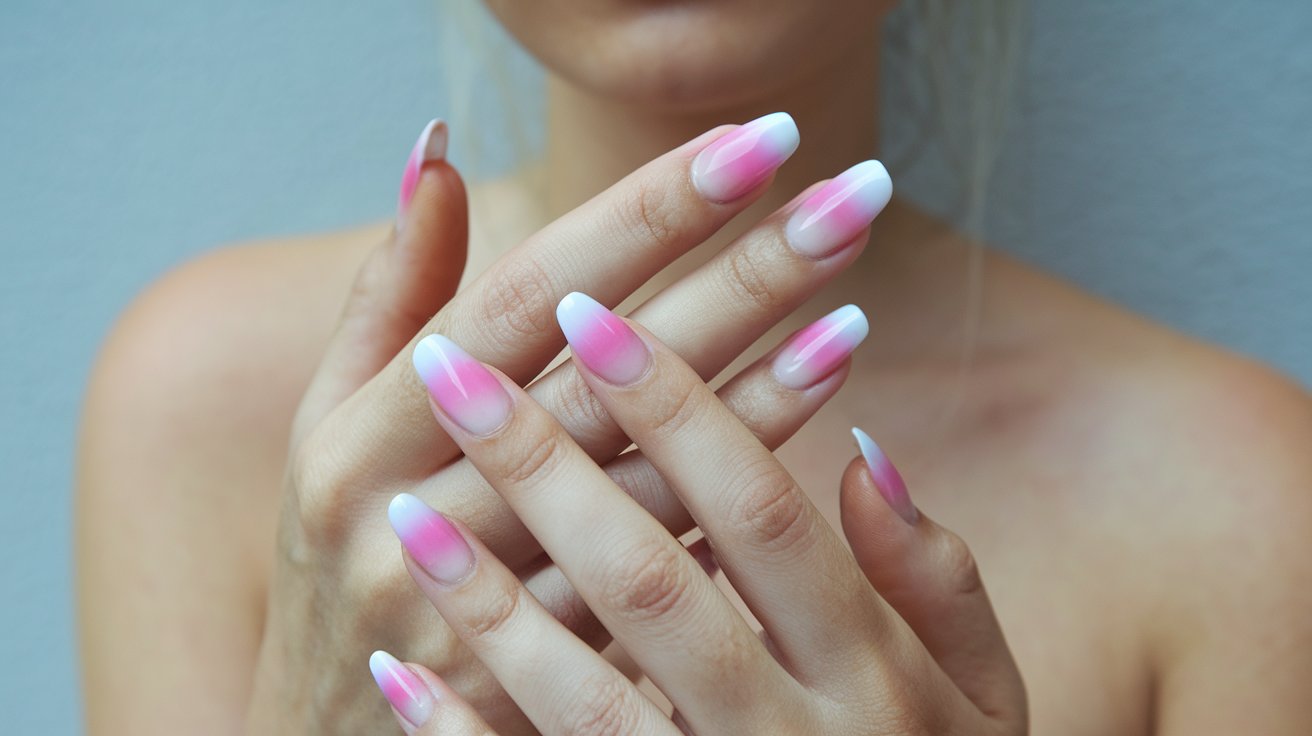
Creating beautiful ombre nails is easier than you think with the right techniques and tools. This gradient nail effect, which seamlessly blends two or more colors from dark to light, has become one of the most popular nail trends in 2025. Whether you’re using regular polish, gel, or acrylic, mastering the ombre technique will give you salon-quality results at home with practice and patience.
Essential Tools and Materials for Ombre Nails
Before starting your ombre nail journey, gathering the right supplies is crucial for achieving smooth, professional-looking results. The most important tool is a makeup sponge or nail sponge with fine texture, which creates the perfect blending effect. You’ll also need your chosen nail polishes – typically two complementary colors work best for beginners.
Additional essential supplies include a base coat to protect your natural nails, a fast-drying top coat for longevity, cuticle oil for nail health, and cotton swabs with acetone for cleanup. Having a small palette or piece of foil for mixing colors and thin nail brushes for detail work will elevate your ombre technique significantly.
How to Do Ombre Nails with Regular Polish
Creating ombre nails with regular polish is the most accessible method for beginners and requires minimal investment in special products. Start by applying a thin base coat to all nails and allow it to dry completely. Choose two polish colors that complement each other well – lighter shades work better as the gradient base.
Apply the lighter color as your base on all nails with two thin coats, allowing each layer to dry thoroughly. While the polish is still slightly tacky, use a damp makeup sponge to dab the darker color onto the nail tips, working quickly before the polish dries. The key to blending ombre colors smoothly lies in using gentle dabbing motions rather than dragging the sponge across the nail surface.
Sponge Technique for Perfect Blending
The sponge method is the most popular technique for achieving seamless ombre effects with regular polish. Apply both colors side by side on a makeup sponge, then gently dab onto the nail starting from the tip and working toward the cuticle. Repeat this process 2-3 times while the polish remains workable, creating multiple layers for a smooth gradient effect that rivals professional salon results.
Brush Blending Method Without Sponge
For those wondering how to ombre nails without sponge, the brush blending technique offers an alternative approach. Apply the base color first, then while still wet, use a small nail brush to apply the second color and blend where the colors meet. This method requires quick work and practice but can achieve beautiful results, especially for subtle ombre effects with closely related color families.
Professional Gel Ombre Nail Techniques
Learning how to do ombre nails with gel polish provides longer-lasting results and more vibrant color payoff compared to regular polish. Gel ombre requires UV or LED lamp curing between each step, which allows for more precise blending and professional-quality finish that can last up to three weeks without chipping.
Begin with proper nail preparation including cuticle care, gentle buffing, and dehydrating the nail plate. Apply a gel base coat and cure under your lamp according to manufacturer instructions. The gel formula stays workable longer than regular polish, giving you more time to perfect your gradient blending technique before curing each layer.
Gel Polish Application Steps
Apply your lighter gel color as the base coat in thin, even layers, curing between coats. For the gradient effect, apply the darker color to a makeup sponge and dab onto the nail tips while the base color is uncured. This technique allows the colors to blend naturally before curing, creating a seamless ombre transition that’s impossible to achieve with pre-cured layers.
UV Light Curing for Gel Ombre
Proper curing is essential for durable gel ombre nails. Cure each layer for the recommended time – typically 30-60 seconds for LED lamps or 2 minutes for UV lamps. Avoid over-curing which can cause the gel to become brittle, and ensure complete polymerization by following your gel manufacturer’s specific curing guidelines for best results.
Creating Acrylic Ombre Effects
Mastering how to do ombre nails acrylic requires understanding the unique properties of acrylic systems and their extended working time. Acrylic ombre offers the most durability and allows for creative techniques like reverse ombre, multiple color gradients, and dimensional effects that aren’t possible with polish alone.
The acrylic method involves creating custom color blends by mixing different colored acrylic powders during application. This technique requires more skill and experience but produces stunning results with incredible longevity. Professional nail technicians often prefer acrylic for complex ombre designs because of its versatility and strength.
Step-by-Step Easy Ombre Tutorial
For beginners seeking how to do ombre nails easy, this simplified method breaks down the process into manageable steps. Start with clean, shaped nails and apply a base coat. Choose two colors within the same color family for your first attempt – this makes blending more forgiving and results more predictable.
Apply your lighter shade as a full coverage base coat with two thin layers. While the second coat is still slightly wet, take a clean makeup sponge and apply the darker color to one end. Gently dab this onto the nail tips, working the color up about halfway. The key is building the gradient gradually with multiple light applications rather than trying to achieve the perfect blend in one step.
Color Selection for Beginners
Successful ombre nail results start with smart color choices. Beginners should select colors that are no more than 2-3 shades apart on the color wheel. Popular combinations include white to pink, nude to brown, or light blue to navy. These complementary color pairs blend naturally and hide imperfections while you develop your technique.
Timing and Technique Tips
Mastering the timing of ombre application is crucial for smooth results. Work on one nail at a time, keeping your workspace organized and polish bottles open for quick access. The ideal working time is when the base coat is set but still has some tackiness – this usually occurs 1-2 minutes after application depending on environmental conditions and polish formula.
Advanced Ombre Techniques and Variations
Once you’ve mastered basic ombre, exploring advanced techniques opens up creative possibilities. Reverse ombre starts dark at the cuticle and fades to light at the tips, creating an elegant sophisticated look. Middle ombre features the darkest color in the center of the nail, fading to lighter shades at both ends.
Multi-color ombre involves three or more colors creating rainbow effects or sunset gradients. These complex ombre designs require patience and practice but result in stunning, unique nail art. Professional nail technicians often combine ombre with other techniques like glitter gradients, stamping, or hand-painted details for truly custom looks.
Common Mistakes and How to Fix Them
Understanding common ombre nail mistakes helps you achieve better results faster. The most frequent error is using too much polish on the sponge, which creates thick, uneven application and muddy color mixing. Always dab excess polish off the sponge before applying to nails, and build the gradient with multiple light layers.
Another common issue is poor color selection – choosing colors too far apart on the spectrum often results in muddy intermediate tones rather than smooth transitions. Stick to analogous colors or use a third intermediate shade to bridge dramatic color differences. Working too slowly also causes problems as polish begins to set before blending is complete.
Cleanup and Finishing Techniques
Professional-looking ombre nails require careful cleanup around the cuticles and nail edges. Use a small brush dipped in acetone to remove excess polish from skin, working carefully to maintain the gradient effect. Apply cuticle oil after cleanup to restore moisture and prevent damage from acetone exposure during the correction process.
Longevity and Maintenance
Extending the life of your ombre manicure involves proper top coat application and daily maintenance. Apply thin layers of fast-drying top coat, ensuring complete coverage of the nail surface. Reapply top coat every 3-4 days to maintain shine and prevent chipping, especially important for regular polish ombre which is more prone to wear than gel alternatives.
Professional Tips from Nail Technicians
Professional nail technicians emphasize the importance of proper nail preparation for successful ombre results. This includes thorough cuticle care, gentle buffing to create optimal adhesion, and complete dehydration of the nail plate. Many professionals recommend using a dehydrating primer before base coat application for maximum longevity.
Temperature and humidity control in your workspace significantly affects ombre blending success. Ideal conditions include moderate temperature (68-75°F) and low humidity. High humidity slows drying time and can cause polish to remain tacky longer than desired, while very low humidity may cause polish to dry too quickly for proper blending.
Related video about how to do ombre nails
This video complements the article information with a practical visual demonstration.
Your questions answered
How do nail techs do ombre nails?
Professional nail technicians use high-quality makeup sponges and work systematically nail by nail, applying base colors first and building gradients with multiple light layers. They control workspace temperature and humidity for optimal working time and use professional-grade polishes that blend more smoothly than consumer products.
How do you blend ombre nail colors smoothly?
Smooth ombre blending requires using a slightly damp makeup sponge with fine texture, applying colors in thin layers, and working while the base coat remains slightly tacky. Build the gradient gradually with multiple applications rather than trying to achieve perfect blending in one step.
Can you do ombre nails with regular polish?
Yes, regular nail polish works excellently for ombre effects and is often easier for beginners than gel polish. The key is timing – work while the base coat is set but still has some tackiness, typically 1-2 minutes after application depending on the polish formula and environmental conditions.
What tools do you need for ombre nails?
Essential ombre nail tools include fine-textured makeup sponges, base and top coats, your chosen nail polish colors, cotton swabs, acetone for cleanup, and cuticle oil. A small palette for color mixing and thin nail brushes for detail work will improve your results significantly.
How long do ombre nails last?
Regular polish ombre typically lasts 5-7 days with proper application and care, while gel ombre can last 2-3 weeks, and acrylic ombre may last 3-4 weeks. Longevity depends on nail growth rate, daily activities, and proper maintenance including regular top coat application.
What’s the best color combination for ombre nails?
The best ombre combinations use colors within 2-3 shades of each other or analogous colors on the color wheel. Popular beginner-friendly combinations include white to pink, nude to brown, light blue to navy, or any monochromatic color scheme from light to dark within the same hue family.
| Ombre Method | Difficulty Level | Durability | Best For |
|---|---|---|---|
| Regular Polish | Beginner | 5-7 days | Home use, practice |
| Gel Polish | Intermediate | 2-3 weeks | Special occasions |
| Acrylic | Advanced | 3-4 weeks | Professional results |
| Sponge Method | Easy | Varies by polish | Smooth gradients |

